
Six Easy Steps for Eyes
One of the most frequent topics I'm asked about is how do I paint eyes. I teach it as part of my 2 day classes and I also teach a class on just painting eyes at conventions as well. I have broken it down into 6 steps (there is an optional 7th step) which I think are pretty easy. It just takes a lot of practice in order to get super comfortable painting eyes on 28mm miniatures.
The image is first then there is accompanying text below the image that explains each step in more detail.
****Note: The basic technique outlined below can be used on larger minis but I tend to add more detail in the iris such as shading the iris and adding more reflective dots to the eye. On larger eyes, I think it's important to include the 7th step as well.
Brushes:
This is very important. VERY IMPORTANT!
Don't try to use small brushes for eyes. I know, I know, the smaller the brush the more detail you can end up getting in there right? Well . . . have you ever experienced the paint drying on the tip of your brush between dipping it in the paint and actually trying to apply it to the model? It's a race against time and you have to try like 20 bazillion times, right?
Yeah, stop using dinky brushes. Throw them out or keep them in your jar as a reminder as to what you started with. I used to use Winsor & Newton Series 7 Miniatures 1, 0, 00, 000 for all of my painting. Now, I don't use anything smaller than a Winsor & Newton Series 7 (not the miniatures) size 1. EVER.
I use fairly large brushes and when I teach, I recommend to people to get larger brushes than what they may be used to.
Here is a photo of some brushes. Left to Right: Winsor & Newton Series 7 Miniature size 000, Winsor & Newton Series 7 (not miniature) size 1, Winsor & Newtons Series 7 size 2, Raphael 8404 size 3.
The top on my size 1, 2 and 3 are fine enough to paint eyes and the Raphaels are super sharp and precise when they are brand new. Fine enough to paint tiny eyes on a 28mm model no problem.

The mat is in centimeters.
I had to actually paint it out in my sketch book as I am sooooooooooooo not Photoshop or digital drawing savvy.
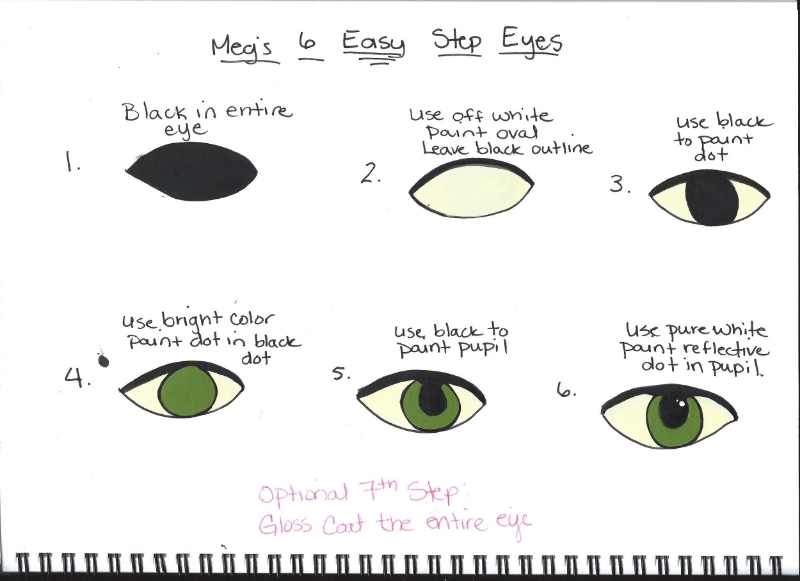
Step 1) Black in the entire eye ball. You can use black or a dark brown. Black tends to look a bit more mascaraed and brown is a bit softer. It's a subtle difference when working on 28mm models but much more noticeable when you get to larger scales.
Step 2) Using an off white, paint a white oval into the area you just painted black. You want to leave a black outline around the off white. Make sure the top of the eye has a thicker black line than the bottom of the eye. You want to use off white because it has a softer and more natural appearance than pure white. Alternately, you can use a white that has a grey tinge.
Step 3) Paint a black dot in the white. This will be the dot that contains your iris, pupil and reflective dots later on. You can position this dot in the eye to indicate the miniature is looking off in a specific direction.
Step 4) Pick a really bright color, brighter than you would normally think, and paint a color dot in the black dot. You want to leave a thin black outline around the color. This is so the color stands out against the off white that makes up the white of the eye. When I say brighter, if you want green eyes, you won't want to use P3 Iosan Green because it won't be bright enough. Instead, go for P3 Wurm Green. The larger the model is the more natural color you can end up using but on super small eyes, like on 28mm models, you want to use really bright colors.
Step 5) Using black, make the pupil in the iris. You have a few options with this. When I am working on 28mm-54mm models I tend to put the pupil in the top of the color dot which leaves a crescent of color in the bottom of the eye or from the middle of the bottom up the side. If you try to put the pupil right in the middle of the iris on smaller models it will just blend in and you will lose any intensity of color. On larger models 70mm and busts you can put the pupil in the middle of the iris. Make sure the pupil is big enough to house the reflective dots.
Step 6) Using pure white, put at least one reflective dot inside the pupil.
*****Optional*****
Step 7: Gloss coat the entire eye. I do recommend doing this on models that have larger eyes. It makes the eye look wet, which our eyes in real life on flesh and blood animals are wet. It's easy to do and it gives that extra dimension to the eye.
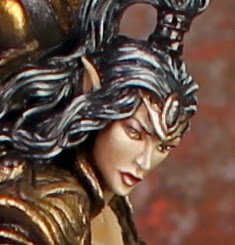
Andrea Zorabeth 54mm painted using 6 Step Eyes
Horse from Andrea Zorabeth 54mm painted using 6 Step Eyes

Nuts Planet Bust Lord of Lion painted with 6 Step Eyes

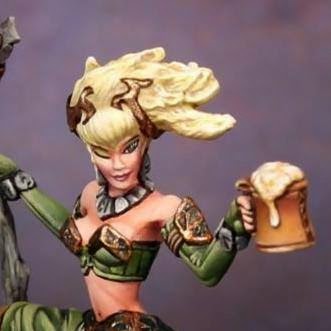
28mm Privateer Press Druid Gone Wilder with the 6 Step Eyes
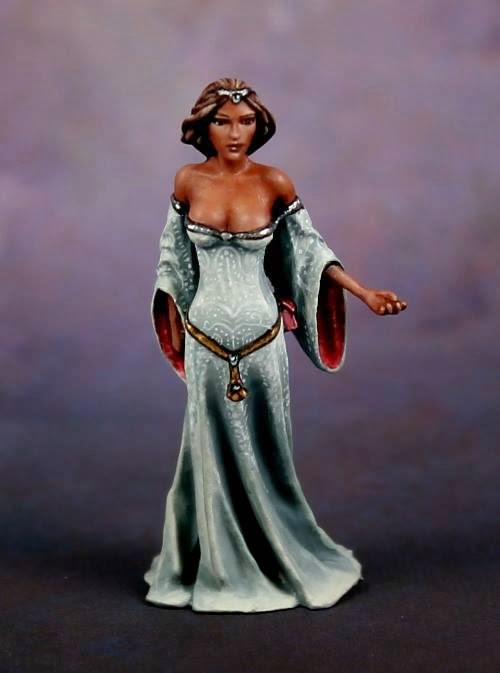
NOTE: There are eyes that are WAY too small to get all 6 steps into. Most of the Dark Sword minis I've painted have teeny tiny eyes. I just go up to 4 steps:
1) Black in the eyes
2) Use an off white to paint the whites of the eye
3) Paint the black pupil
4) Paint the reflective dot with pure white
These minis below are examples of eyes too small for the 6 Easy Steps. Instead, I used the four steps outlined above.

I hope this helps demystify how I paint eyes. I do recommend painting eyes as the first thing on the model. I basecoat my face with flesh tone first then paint the eyes in. I never leave them for last because the process can be messy. I wouldn't want to ruin the rest of the face when painting the eyes and making a mistake. So, I paint them first, that way I can really clean up the eyes and make sure they are bright and clear on the model. I find it much easier to avoid the eyes while I paint the rest of the face than the other way around.
I also recommend painting a ton of eyes! Reaper has a great figure called the Faceless Horror. My friend Alex, over at Ironheart Artisans, took my class one year then went and got that model. He lost count at 180 eyes. By the time you get done with that mini you will be an Eye Painting Maestro!